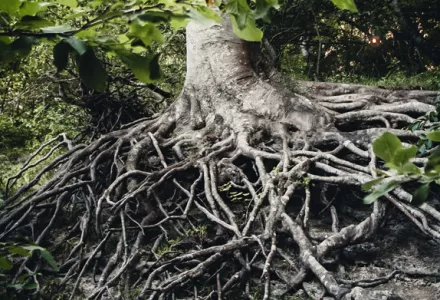
Everyone focusses on the visible don’t they? Always concentrating on the thing that is immediately obvious and neglecting other areas that aren’t necessarily as exciting, but still equally just as important. For example, the incredulous election of a farcical president will often have people questioning what it is that the voting majority saw in the appeal of such a character. “How the blazes did that *cough* guy get elected” you might ask yourself. While the identity and persona of the elect does obviously play a large part in the result, it would be wiser to focus on the social and economic conditions in place that have led to this situation in the first place, from the grass root upwards.
Seamless political links aside, focusing on the roots upwards seems an almost backwards way for some growers to conduct their business. More often than not, the same amount of water will be fed to plants, day after day, following a strict EC and pH schedule to the ‘T’, When I say strict schedule, it’s sometimes more a case of, “I just give ‘em each a cola bottle full of water with a cap full of part A in through veg. Then switch to part ‘B’ for bloom”. Unfortunately, you’re going to need to be a bit more savvy than that to properly cater for your root’s needs.
Underground Resistance
It is not just the things happening above ground that can influence the opening and closing of stomata. Conditions in the root zone can also influence whether the stomata can remain wide open, or shut themselves off from the world like little hermits. If the conditions in the substrate get to the point where root pressure is less than that of the demands of the shoots, then they will begin to close themselves off to compensate for this. Closed stomata means no photosynthesis, which means no growth!
Obviously, this is something that we want to avoid. So what is it that affects root pressure? Well let’s have a little look shall we?
Moisture Content
This one is easy enough to understand on the face of it. In layman’s terms, is there enough water in the substrate? Sounds easy right? Nothing is easy in life my friend. Exactly when and how much you should actually be watering is possibly one of the trickiest things to get right. Different substrates need to be looked at and treated accordingly, as they all have different water holding properties. On top of that, different plants all have different water requirements throughout different stages of their life cycle. All of this combined with seasonal fluctuations in the environment impacting on water requirements leads to no one-rule being correct. Brace yourself: you will need to use your head and constantly adjust your irrigation strategy to ensure your moisture content is adequate for optimal growth.
At the same time you need to take into account whether you want to steer your plant vegetatively or generatively. Irrigating so your substrate is on the wetter side of the curve will steer your plants towards vegetative growth whereas a dryer substrate will encourage generative growth. However, you obviously don’t want to run the roots so dry that there is no root pressure, as all the available water has gone. Similarly, a 100% saturation will mean a low force is needed to take up the water, but at the same time the oxygen content is much more likely to drop to detrimental levels, not only lowering root pressure, but also leading to issues with anaerobic diseases.
Different Substrates
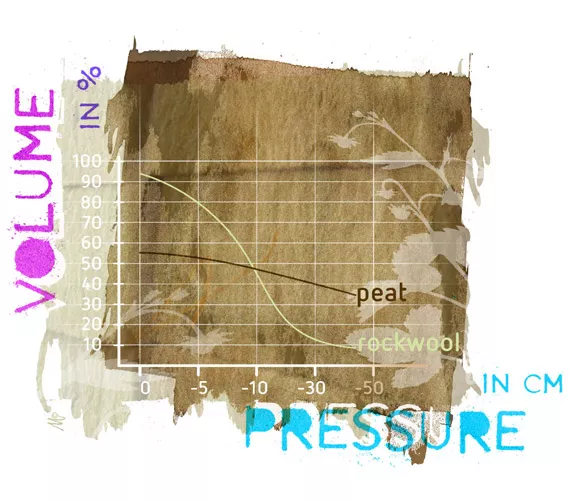
Each substrate has different water holding capacity and retention property. The illustrated pressure curve shows how Rockwool and soil both act going from wet to ‘dry’. Essentially It shows how much pressure (or force) is needed to take the water from the substrate, from its wettest point, to its driest point. The first thing you will notice is that the soil line is very shallow, while the Rockwool curve is very steep. So what does this mean?
Let’s look at it from the point of having 10L of Rockwool as a substrate compared to 10L of soil as a substrate. With Rockwool you can see that a lot higher percentage of the substrate’s volume can contain water. From 94% down to 10% to be precise, so essentially 85% of a 10L Rockwool block will be water. That’s 8.5 Litres compared to 1.5 Litres when looking at the peat line. Peat is fully saturated at 55% and ‘dry’ at 40%, so 15% of the 10 litre total volume is available as water.
This means there is a lot higher buffer of water in Rockwool, meaning that it can give a lot more room for steering plants with either a wetter or dryer substrate. Or, to put it another way, you need more L/m2 of Peat compared to rockwool. Example: 4X 8.5L slabs of rockwool = 35L water/m2. Compare this to 200L of peat = 30L water/m2). This is why you need a larger volume of media when using peat compared to rockwool. (16/m2 x 12L pot is 192L of peat)
It is also a lot easier for the plants to take an amount of water from Rockwool. The steepness of the curve means that less force is needed to take the same volume of water compared to that of soil. So to get the same amount from soil, the plant must work harder for it. Relatively, this means more energy is allocated to the roots and less energy can be allocated to plant growth. This is just one of the reasons why growing hydroponically has the potential for higher yields and faster growth over that of conventional soil growing.
EC: How to make water dry
I beg your pardon? Making water dry? Firstly, what does this mean and secondly, why the expletive would you want to do that? In answer to the first question, it is entirely down to the presence of salts. Fertiliser salts
to be precise, but more to do with the physical nature of salts themselves and what they do to water. Science fact: Salt attracts water. So the higher the EC of a substrate, the higher the amount of salts it contains. The more salts there are attracting the water, the more energy is needed by the plant to take the water away from these salts. Plants don’t feel wet and dry like we do as humans. More energy needed for the roots to either take the water from the substrate, or away from the salts on the substrate is essentially the same thing to them: it just ‘feels dryer’. Obviously plants need these salts in a hydroponic environment; to provide the main nutritional requirements for the plants is their most obvious task, but the effect the salts have is also used to help steer the plant towards generative growth. Helping to imitate the dry season towards the later half of the flowering cycle (before the flushing period) with a high EC (usually from additional PK additives) is something that can be of great benefit to a plant, to properly finish off a harvest.
Oxygen levels/Temp of substrate
Roots need oxygen available in the solution in the substrate to perform and function correctly. At the same time they also need it to be a nice warm temperature, so their metabolic processes aren’t stiffled through exposure to too cold a temperature. These two variables are linked in a similar way to that of temperature and humidity in the air. As the temperature of a solution rises, the solubility of the oxygen in it decreases. So the colder it is, the easier it is to achieve higher levels of Dissolved Oxygen (DO) in the solution However, don’t just go as cold as possible you need a decent temperature to keep the metabolic rate of your roots at the optimum level, so balancing the temperature to account for these two variables is key.
Ideally, aim for the temperature of your nutrient solution to be between 18 and 22 degrees Celsius. This should then take into account for the warmer temperatures you will likely see in the actual substrate in your pot, which you want to maintain between 20 and 24 degrees Celsius. Air pumps or stones are not advisable for trying to increase the DO of your reservoir (because they are fixed by the water temperature), as they will likely cause fluctuations with your pH levels.
Balancing above and below - Root Pressure vs Transpiration
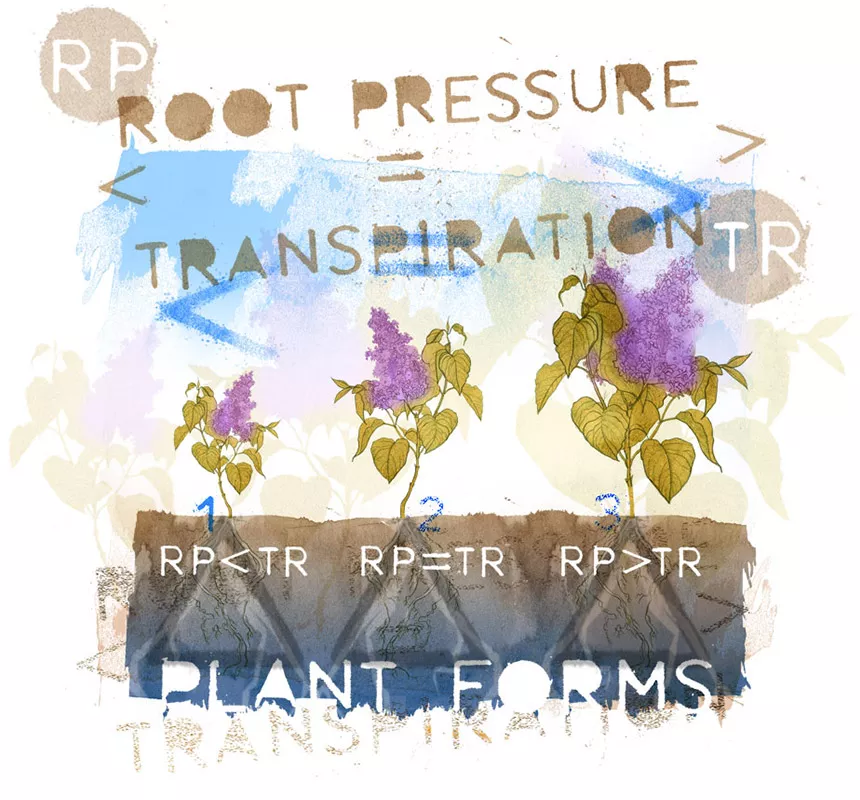
Differences in the amount that a plant transpires via the stomata, compared to a continual supply of water from the roots can and will manifest itself in differences/changes in growth. These differences in growth patterns are (for once) something that we as humans can actually see and give us a good indication where the balance of root pressure against transpiration lies, and what we could do to address any imbalance this growth has shown us.
Root pressure < Transpiration
This is the plant on the left of the three. It can either be that not enough water is being supplied by the roots or that transpiration is demanding more than can be supplied from the roots. If your plant is in this sort of situation, then you will see a difference in the form of your plant. Key indicators to look out for are as follows.
1- Compact Growth
High amount of water used in transpiration limiting amount for storage and growth, results in a squater, more compact plant with shorter inter-nodal difference.
2- Smaller leaves
Leaves keep a smaller surface area to limit exposure to heat and therefore transpiration requirements.
3- Curled Leaves
In an effort to reduce the surface area of the leaf exposed to extreme conditions(such as heat from the light), the leaf will curl itself upwards
4- Early autumn colouring
Plants unable to cool itself adequately due to either low root pressure or high transpiration. Being unable to cool leads to burning of the leaves, when this starts, the plant draws the remaining energy from the leaf to redistribute around the plant, causing the leaf to yellow and eventually drop off.
5- Early ripening
Pretty much all natural processes happen faster at higher temperatures. Ripening is no stranger to this rule. With a limited water supply and a high transpiration, the plant will be unable to cool itself adequately. This higher temperature will result in a faster, sometimes premature ripening process.
| ROOT PRESSURE PROBLEM Moisture content is too low |
ROOT PRESSURE SOLUTION Increase amount and/or frequency of irrigations |
TRANSPIRATION PROBLEM Temperature too high |
TRANSPIRATION SOLUTION Decrease light intensity, increase air exchange |
|---|---|---|---|
| Oxygen level too low 1) High water/substrate temp. 2) Overwatering |
1) Lower the substrate temp. 2) Decrease amount of waterings |
RH too low | Increase humidity Lower temperature |
| Substrate temperature too low | Increase temp of substrate | Air exchange too little for amount of heat generated by lights | Lower temperature threshold on extract fan controller or upgrade extract fans. |
| EC of substrate too high | Decrease strength of nutrient solution. Possible flush | Air flow too high | Manoeuvre fans to create optimal uniform environment. |
Diagram 1: Here are a few typical problems associated with a higher root pressure compared to transpiration, and how you can combat them.
Root pressure > Transpiration
This is the plant on the right of the three. This can either be from an over efficient root system (For example, a large mass with a high(ish) temperature, low EC and a high moisture and oxygen content) or from the shoots of the plant not being able to transpire correctly (from too high a humidity, for example). Whatever the reasons may be, the result is that there is more water being ‘pressed’ into your plant than is being released. This water is stored in your plant and also causes its form to change. You will notice your plant’s growth respond in a few potential ways:
1- Long/Stretched inter-nodal distance
There is more water being pushed into the plant than is being used, but it still has to go somewhere right? This extra water ends up causing the inter-nodal distances to increase, so you will notice your plants becoming taller and stretchier than usual.
2- Big Leaves
Similar to the result of a larger inter-nodal distance, larger than normal leaves will also manifest themselves if you have a greater amount of root pressure compared to transpiration rates.
3- Fluffy/loose flowers
This water is not only being pressed into the stems and leaves, but also the flowers too, so they will become big and fluffy, but not with the usual density you would be accustomed to. They might look good on the plant but will soon shrink down during the drying process.
4- Guttation
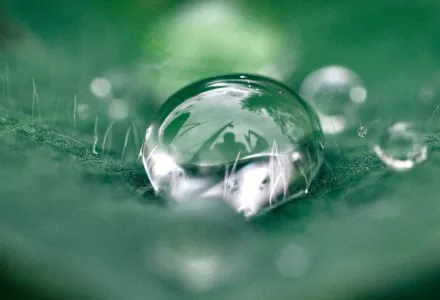
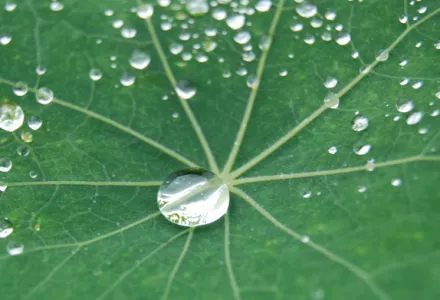
In extreme situations, as no water can get out of the stomata, it is literally forced out through pores on the tips of the leaves. You will see beads of water will collect at leaf tips, looking very much like dew drops.
5- Botrytis
In the presence of all of this extra water, there is one disease in particular that can rear its ugly head. Having a high root pressure, combined with full flowers towards the end of the generative period, is the ideal conditions for botryitis to take hold. Here are a few typical causes associated with this scenario and how you could combat them: See diagram 2.
| ROOT PRESSURE PROBLEM Moisture content too high |
ROOT PRESSURE SOLUTION Decrease amount and/or frequency of irrigations |
TRANSPIRATION PROBLEM Temp too low |
TRANSPIRATION SOLUTION Decrease extraction or introduce more lights |
|---|---|---|---|
| EC too low | Increase strength of nutrient solution | RH too high | Increase extraction or introduce de-humidifier |
| Root temp too high | Use nutrient chiller / cover root zone with reflective material | Air flow too low | Introduce more room / pedestal fans |
Diagram 2: Here are a few typical problems associated with a lower root pressure compared to transpiration, and how you can combat them.
Summary
Of all the information to take from this article, simply knowing how your plant grows is crucial to achieving success. If you can spot the differences in growth patterns that changes in the environment can bring, then you will be all the wiser when it comes to tackling any problems that rear their ugly head.
You will soon see that a plants’ form and shape is like some sort of esoteric language and building your fluency will allow you to meet your plants needs to a highly efficient degree. Keep all of these steering factors in mind when you are tinkering in your grow room and ultimately, your fingers will become the greenest in your community.

